Team Setup
Invite teammates, manage ownership, and configure enterprise access from Corinthian settings.
This page covers setting up a real multi-user workspace in Corinthian, including inviting members, reviewing invite delivery, handling ownership safely, and enabling SSO or directory-driven access.

Before you start
Before you invite anyone, make sure:
- your workspace already exists and you can reach the dashboard
- at least one owner can sign in successfully
- the owner has completed the initial onboarding needed to reach settings
- you know whether teammates should join through normal invites or enterprise identity rules
Step 1: Open the members settings
Go to Settings → Members.
This page is split into:
- Active for current members
- Invited for pending invites and invite history
Use the search box if you need to narrow a larger roster before taking action.
Step 2: Invite teammates with the right starting role
Click Invite member and enter one or more email addresses.
Invite-time roles are:
- Viewer for read-only access
- Support for shared account and billing work without full admin controls
- Admin for members who need settings and member-management access
Corinthian does not invite owners directly. If someone should become an owner, invite them first with a normal role and transfer ownership only after they have joined.
Step 3: Confirm the invite delivered
Open the Invited tab after sending the invite.
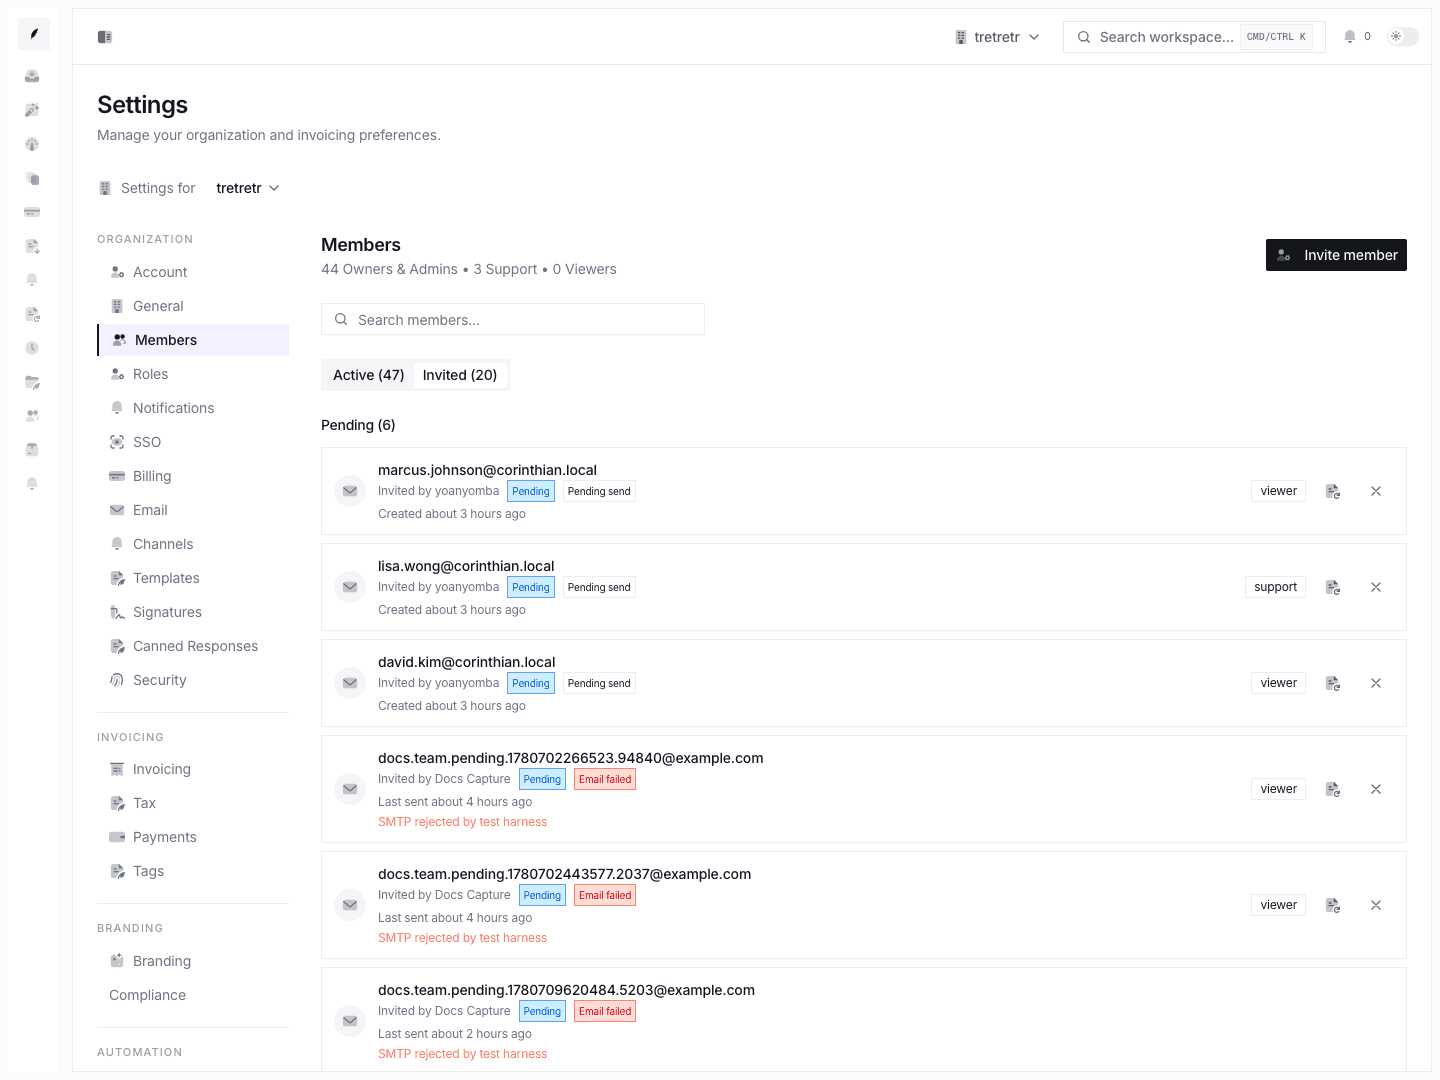
Review both the invite status and the delivery state:
- Pending means the invite is still open
- Accepted, Revoked, and Expired stay visible in history
- Email sent means Corinthian recorded a successful send outcome
- Email failed means the invite exists but the delivery attempt failed
If delivery fails, resend from the same tab instead of creating duplicate invites.
Step 4: Manage active members safely
Use the Active tab for current members.
Change non-owner roles
Use the row action menu to move a member between admin, support, and viewer.
Ownership is intentionally excluded from the generic role-edit flow.
Transfer ownership explicitly
If ownership needs to move, use Transfer ownership from the member row action menu.
This flow:
- promotes the selected active member to owner
- demotes the current owner to admin in the same transaction
- keeps the workspace protected from ending up with zero owners
Only owners should use this handoff flow.
Remove a member with an impact check
If a teammate should lose access, use Remove from the row action menu.
The confirmation dialog can show an impact summary before removal, including owned invoices, clients, and templates. Use that summary to decide whether reassignment work is needed first.
Removing a member revokes access immediately, but business records stay in place.
Step 5: Configure enterprise access when needed
Go to Settings → SSO when the workspace needs domain-based onboarding or company-managed identity.
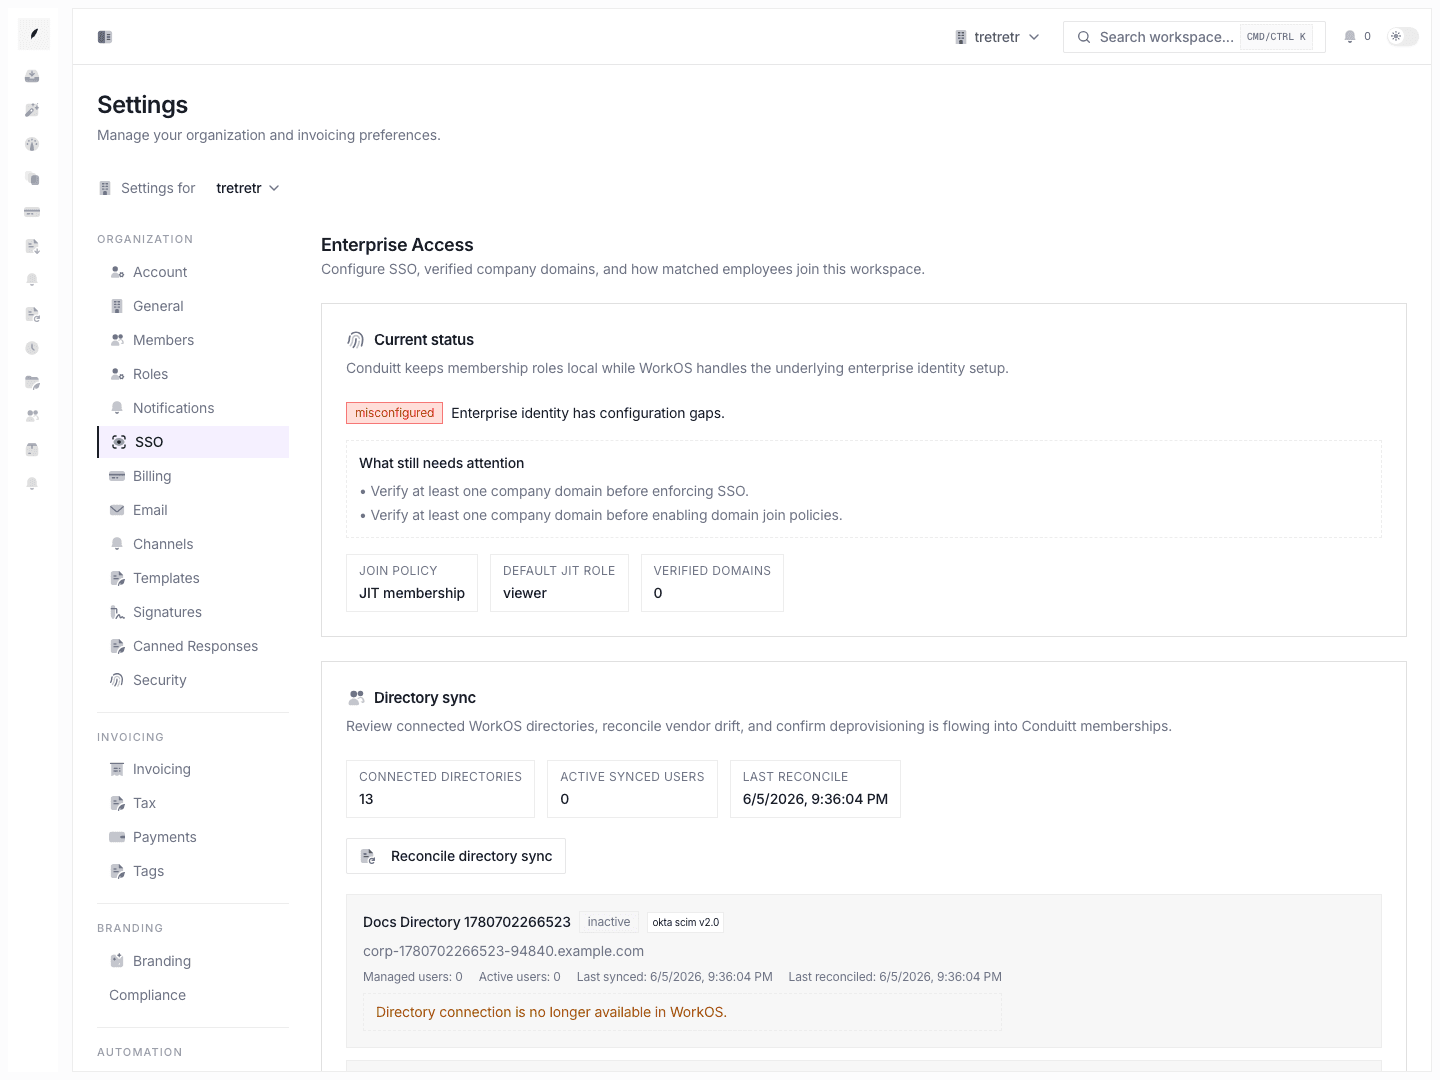
From this page, owners can:
- require SSO for the workspace
- add and verify company domains
- choose how matched-domain users join
- set the default role for JIT-created members
- review directory sync state and reconcile it when enterprise sync is enabled
Join policy choices
Use the join policy that matches how tightly you want identity to drive access:
- No action keeps sign-in separate from workspace access
- Suggested workspace join helps matched users find the right workspace
- Automatic pending invite keeps access in the normal invite approval flow
- JIT membership creates membership directly for approved domains with a Corinthian-controlled default role
Directory sync
Enterprise organizations can also use directory sync for reconciliation against the identity provider. This is the right path when membership creation and deprovisioning should follow the external directory instead of being driven manually by invites alone.
Step 6: Verify the setup after changes
After onboarding the team, verify:
- pending invites reflect the real delivery outcome
- accepted invitees land in the correct organization
- only the intended people have admin or owner access
- ownership transfer has a clear single owner outcome
- SSO and verified domains show an active or intentionally configuring state
- directory sync appears only where enterprise access is in use
Recommended operating pattern
- Start with normal invites for small teams and early internal testing.
- Keep owners limited and use transfer instead of promoting roles ad hoc.
- Review the invited tab after each invite batch so failed delivery is not mistaken for successful onboarding.
- Turn on verified domains and SSO once the workspace starts onboarding a larger company or IT-managed team.
- Add directory sync only when external lifecycle management is truly required.