Manage Team Members and Ownership
Invite teammates, review invite delivery, change roles, transfer ownership, and remove members safely from the members workflow.
This page covers the day-to-day member-management workflow, not just the high-level team setup overview.

1. Invite teammates from Settings → Members
Go to Settings → Members and click Invite member.
The invite sheet supports:
- one or many email addresses in the same batch
- a single shared role for that batch
- these invite roles:
viewer,support, andadmin
Important rule
You cannot invite someone directly as owner. Ownership must be transferred after the person is already an active member.
2. Choose the initial role intentionally
Use the available role meanings as your starting point:
- Viewer for read-only visibility
- Support for teammates handling assigned accounts and customer work
- Admin for teammates who need settings and member-management access
Pick the smallest role that fits. You can change it later for active non-owner members.
3. Review invite state and delivery in the Invited tab
After sending the invite, move to the Invited tab.
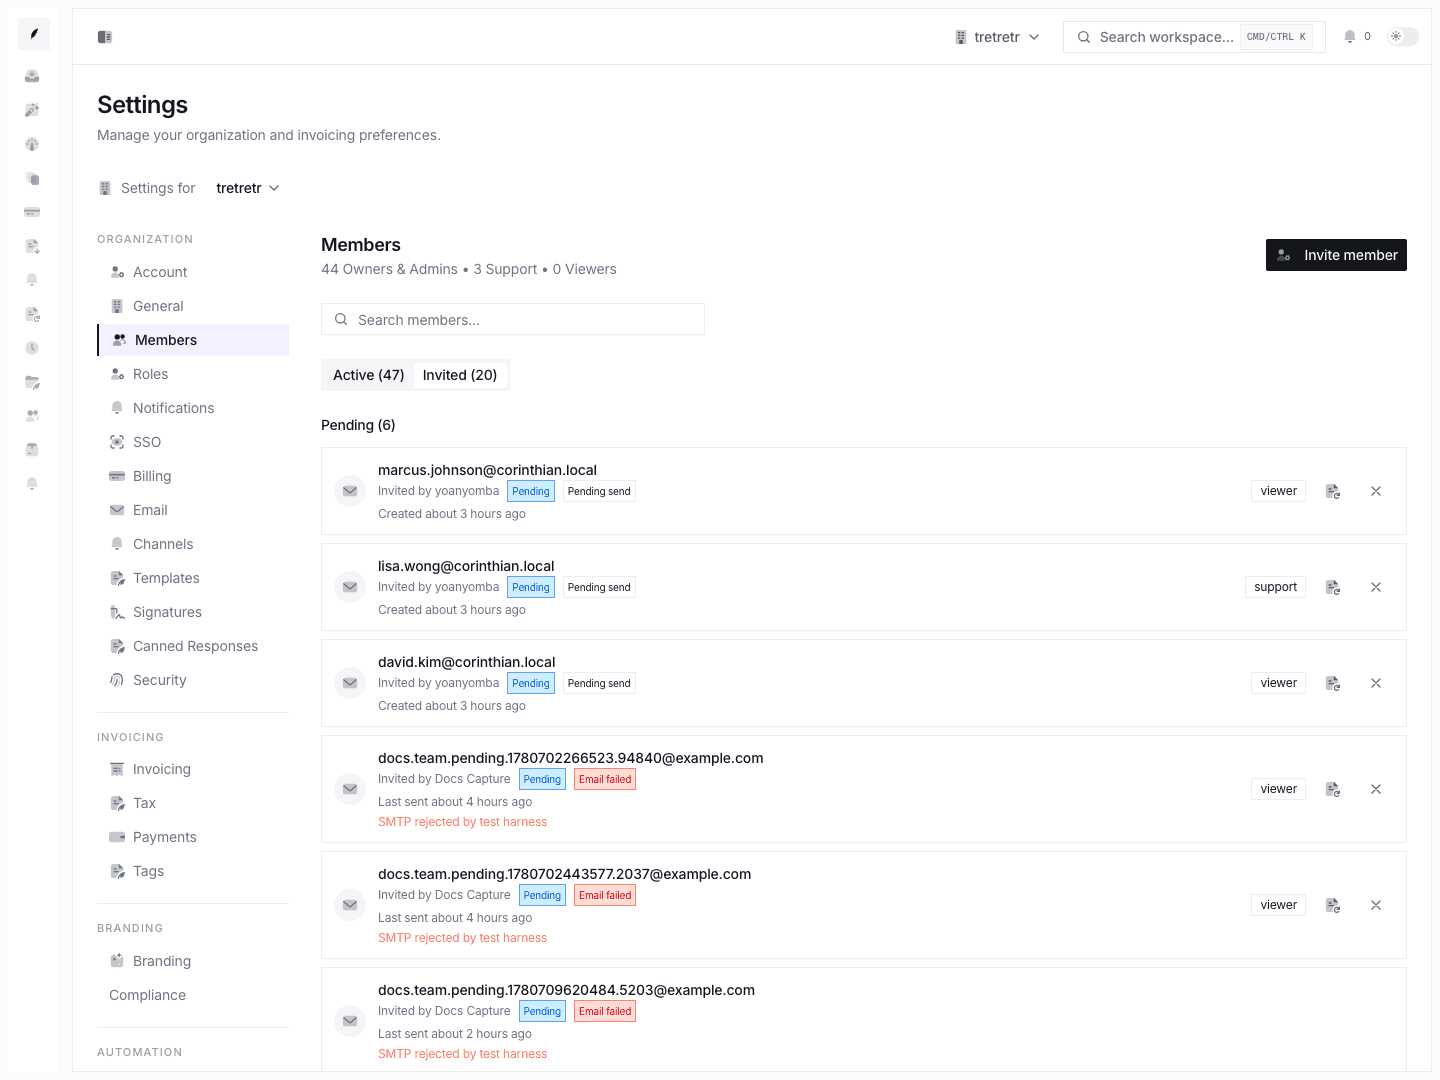
The invite list lets you distinguish:
- Pending invites that are still open
- Accepted invites that converted into membership
- Revoked and Expired history
- delivery state such as Email sent or Email failed
What you can do from here
- Resend a pending invite
- Revoke a pending invite
- review history without mutating accepted, expired, or revoked records
4. Change a member role from the Active tab
On the Active tab, open the row action menu for a non-owner member.
The available role-change actions are:
- Make Admin
- Make Support
- Make Viewer
This is the normal way to adjust workspace access after the person has joined.
5. Transfer ownership deliberately
Use Transfer ownership from a non-owner member row when the workspace owner needs to change.
This flow includes strict safeguards:
- only the current owner can transfer ownership
- you cannot transfer ownership to yourself
- the target must already be an active member
- the target becomes owner immediately
- the current owner is downgraded to admin in the same transaction
Treat this as an explicit handoff, not a casual role edit.
6. Remove members with the impact preview in mind
Use Remove when a person should lose access completely.
Before confirmation, Corinthian shows an impact summary for the member’s owned:
- invoices
- clients
- templates
That preview is the signal to reassign important work after removal if needed.
Safety rules
- removing the last owner is blocked
- removing an owner requires owner-level control
- removal revokes access immediately
7. Understand the permission model
Sensitive actions still require the right permission even if the page is visible.
Practical meaning
- member-management mutations require the
manage-memberspermission - owner and admin roles carry the management paths
- support and viewer do not
Treat page visibility and editing permission as different things in the product.
What to verify before you finish
- invitees have the smallest correct starting role
- pending invites were delivered successfully or intentionally left to resend later
- ownership has only one clear current owner
- removed members’ owned work is understood before access is revoked